This episode of Shelf Life, our original web series, is all about the different ways scientists preserve one of the Museum’s rarest and most iconic specimens: the coelacanth.
But preserving collections for posterity is the name of the game across all departments, and we’ve gathered examples of how specimens are prepared in other disciplines, from anthropology to physical sciences.
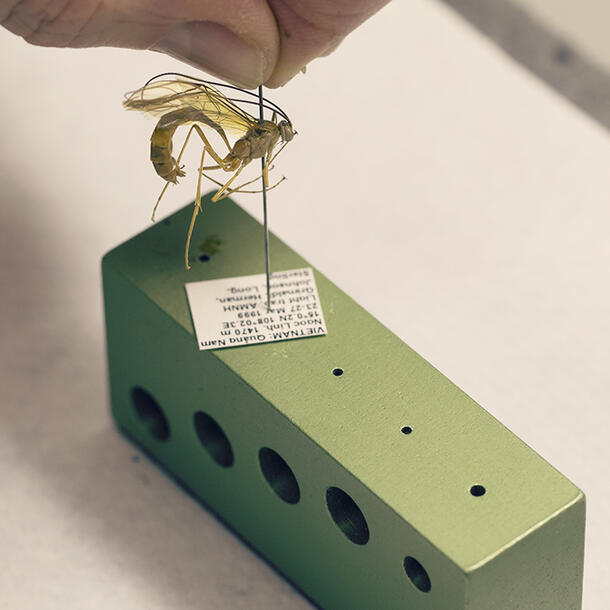
Pinned insects are central to entomologists’ work, but these fragile beauties can’t be moved much—removing them from their cases carries the risk of damaging a carefully prepared specimen.
To minimize handling, each specimen is placed on a stainless steel pin and housed on a special pinning block along with tiny cards indicating the species and basic data points. Preparators like the Museum’s Melody Doering ensure that despite their small scale, these crucial details are easy to read by placing them a uniform distance apart: a date-and-time of acquisition card 5 millimeters below the specimen, and a species label 5 millimeters below that is added later by scientists. Information about the animal is always visible, keeping specimens from being unnecessarily disturbed.
Certain specimens require special preparation even before they’re pinned. Field researchers, for example, often place bees in vials of alcohol, a common preservative. But alcohol can wreak havoc on the animal’s hair, a key part of its anatomy and one that has to remain intact to keep the specimen useful for further study. So to look their best for future generations of researchers, bees have to be shampooed and gently blow-dried before the pinning process begins.
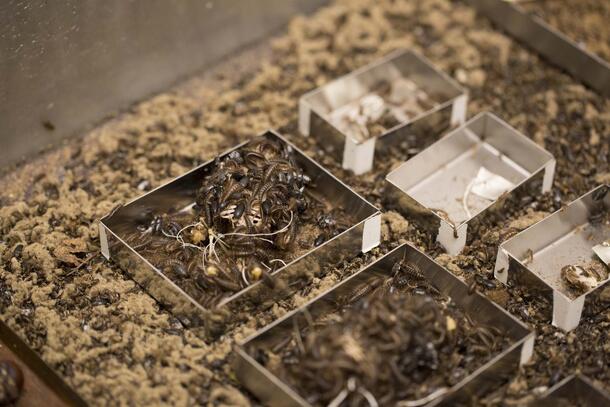
One of the more traditional means of preparing skeletons for collections? Getting flesh-eating beetles to do the hard work. Dermestid beetles “will gladly tackle fish, amphibians, reptiles, birds, and mammals with little to no preference,” says Robert Pascocello, senior scientific assistant and keeper of the Museum’s in-house Dermestid colony.
The colony is made up of Dermestes maculatus, or hide beetles, a common species found on every continent except Antarctica. Specimens usually have large organs removed before being placed in the colony, and they are generally air-dried as well to prevent putrefaction as the beetles go about their business. A small bird prepared in this way will be skeletonized by the colony in between one and three days.
Dermestids aren’t picky eaters, and hides, skins, and fabric are all potential meals for loose beetles—or worse, a place to lay eggs that hatch into hungry, hungry larvae. To prevent escapes, the Museum’s colony is kept in a small room with a single door. Temperatures are kept cool to keep the Dermestids grounded, as hide beetles don’t fly in temperatures below 75 degrees Fahrenheit. The tops of the beetle containers are coated with petroleum jelly to deter escapees, and a strip of glue at the door catches any beetles trying to make a break for the exit.
Clearing and Staining Fish, Reptiles, and Amphibians
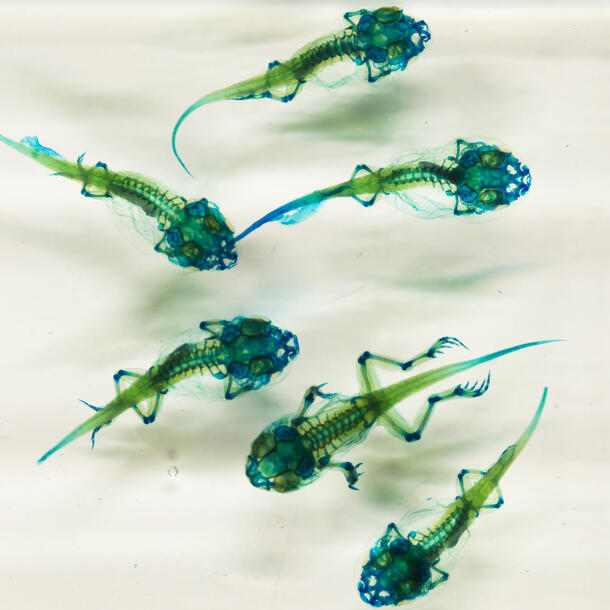
Placing a specimen in a succession of bleaches, dyes, and fixing enzymes turns the flesh transparent while the bones and cartilage are dyed bright colors in a process known as clearing and staining. The result is a transparent example of the animal’s bone structure that can be studied for decades and decades.
While the technique is most often used to preserve fish, the Museum’s herpetologists also use clearing and staining to get a better look at the inner workings of reptiles and amphibians—particularly small specimens, like the tadpoles pictured here.
This prep method is especially helpful for getting an unhampered view of limbs and other skeletal structures that may not be visible in the living animal or are changing from cartilage to bone, like the skulls of these tadpoles. Cleared and stained specimens “allow us to see bones of vertebrates in their natural positions and their relationships to soft body parts, something that is mostly lost when dry skeletons are prepared,” says Curatorial Associate David Kizirian. Preserving specimens in this way also prevents the loss of small bones that can go missing during the dry preparation of a skeleton.
While clearing and staining is a historically common practice, and one that’s still used regularly, it is being slowly replaced by CT scans, which can offer more information about anatomy without permanently altering the specimen.
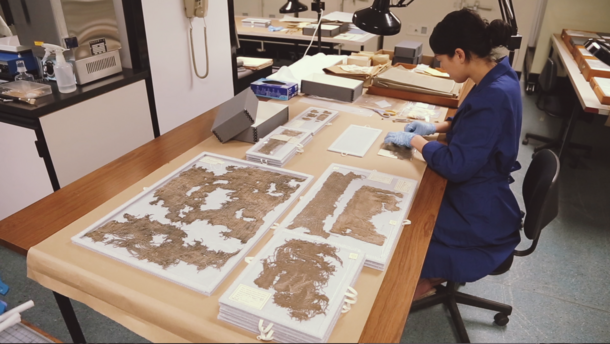
It’s not just biological specimens that need preservation. Making sure the Museum’s vast collection of cultural artifacts will be around for decades to come requires delicate handling—and creative solutions. Case in point: the specialized cases for housing fabrics made between 3000 and 1000 B.C., which were discovered in a burial site by Museum archaeologists working during the 1940s in Huaca Prieta, along the northern coast of Peru.
To the naked eye, the fabrics look like plain burlap. But a glance through a microscope reveals that the individual strands of these unassuming textiles were once dyed and woven into intricate forms, including geometric patterns and images of local wildlife such as condors. These details give researchers clues to the environment, aesthetics, and beliefs of ancient cultures.
Making both sides of the weave accessible to researchers presented an interesting challenge. To avoid the wear-and-tear that inevitably comes when a sample is lifted and flipped over, collections staffers in the Division of Anthropology built custom cardboard supports that can be opened from either side. Viewers can flip the support for an up-close look at both sides, all without ever needing to touch the fabric.

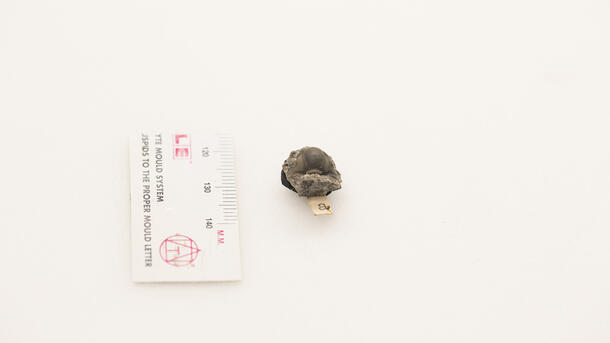
Sometimes, less really is more. That’s the case with micromounting, a process in which tiny samples of minerals are placed for detailed viewing in boxes measuring about 20 mm a side.
While they’re not as impressive as large mineral samples, micromounted minerals provide some advantages for researchers. In many minerals, the smaller a crystal, the more perfect it is, so the tiny micromount specimens can give viewers a better look at a version of the crystal with the fewest flaws possible.
Micromounts also conserve space, letting researchers study and compare a wide variety of crystals at once. And some minerals don’t get larger than micromount size at all, making this a perfect medium for displaying them.
Prepping for Paleontology
Trilobites are extinct arthropods that come in thousands of different varieties, some with long spines, others boasting impressive eye stalks. But not all species have these strong distinguishing characteristics, and discerning which of the more than 20,000 recognized trilobite species a fossil belongs to is no easy task.
How do the Museum’s paleontologists prepare a specimen for identification? Find out in this post, as Assistant Curator Melanie Hopkins walks us through the process of preparing this fossil.