Create a Coral Reef
Instructions
Make a coral reef diorama to help others understand these marine creatures and their amazing body forms.
Below you'll find instructions for making:
- diorama box
- brain coral
- sea fan
- sea anemones
- sponge
- other coral reef organisms
Step 1: Making the Diorama Box
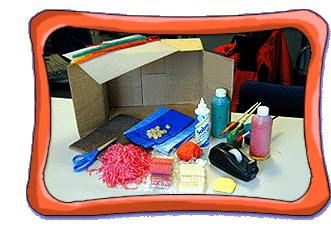
What You'll Need
- cardboard box, approximately 2 feet x 1 foot
- blue tissue paper or blue construction paper (or even newspaper painted blue)
- clear tape
- a few pieces of sandpaper OR paper, sand, and glue
- scissors
What To Do
WHY THIS SHAPE? The shape of the diorama box is designed to give you the maximum "floor" area for presenting your 3-D scene and it makes it possible for you to hang creatures from the "ceiling" of the box.

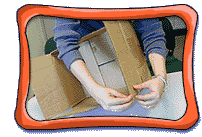
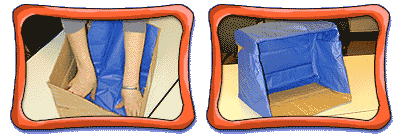
With help from an adult, use the scissors to cut off one of the pieces of the lid from one of the long sides of the box. Then tape together the two remaining corners.

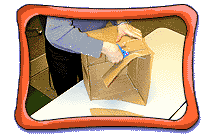
Use the scissors to cut each of the short sides diagonally.
Use tape to cover the box with blue tissue paper (or blue construction paper). IMPORTANT: Don't put blue tissue paper on the bottom of the diorama — this space will be used to create the sandy seafloor.

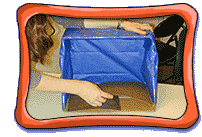
Tape pieces of sandpaper to the bottom of the diorama. NOTE: As an alternative, you can glue some sand on the bottom — or color a sandy seafloor with markers or crayons.
Step 2: Making Brain Coral
What You'll Need
- bag of "radiatore" pasta; it has a ruffled, ridged shape
- ball of modeling clay, Model Magic™, or Play Doh™
- paint, green, yellow, and brown
- brushes
- plastic cup or bowl for paint
- cup of water, for cleaning brush
- newspaper, to put on table before painting
What To Do
GROOVY & WAVY: Corals come in many shapes and sizes. The brain coral gets its name because its shape resembles the grooves and ridges of the human brain.
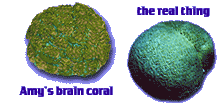

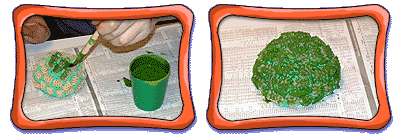
Take a grapefruit-size piece of green Play Doh™ or Model Magic™ and make it into a dome shape. Then stick pieces of "radiatore" pasta on the surface. Put the pasta at different angles to imitate the maze-like pattern on brain coral.
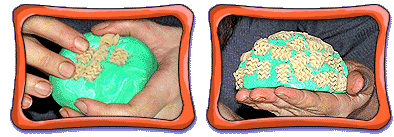

Put the pasta-covered dough on a piece of newspaper. Paint the pasta pieces olive green. To get an olive-green color, mix green and yellow paint with a little brown or blue. Brain coral get their green color from the algae that live with them.
Step 3: Making a Sea Fan
What You'll Need
- sheet of white (plain) needlepoint canvas (available at crafts stores or large department stores)
- pipe cleaners, thick (fan corals are usually orange, red, yellow, pink or purple)
- pipe cleaners, thin (orange, red, yellow, pink, or purple)
- newspaper, to put on table before painting
- paint, orange, red, yellow, pink, or purple
- plastic cup or bowl for paint
- brushes
What To Do
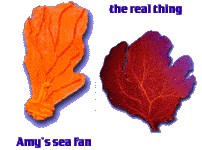
ONE OF YOUR BIGGEST FANS: Sea fans may look like plants, but they are actually coral, made of many tiny animals that work together. These animals use their little feathery tentacles to catch plankton as it drifts by. Sea fans are filter-feeders that grow perpendicular to a strong current. They're like plankton nets. They don't form part of the hard reef, but grow near it.
I'm going to show you how to make a red sea fan. Its scientific name is Swiftia kofoidi.

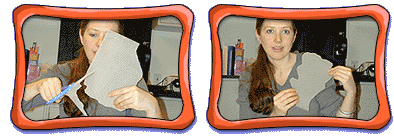
Use scissors to cut a piece of needlepoint canvas into a tree-like shape (SEE PICTURE). Don't worry about getting the shape exactly like the model in the photo.

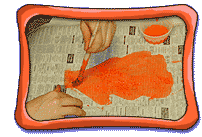
Lay down newspaper, then paint the needlepoint canvas orange, and let it dry.

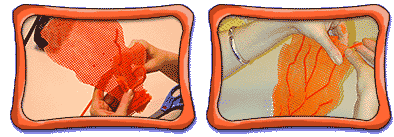
Weave a THICK orange pipe cleaner through the bottom "trunk" of the canvas (SEE PICTURE).
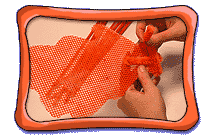

Using the photo to the right as a model, weave THIN orange pipe cleaners into the needlepoint canvas.
Step 4: Making Sea Anemones
What You'll Need
- a bag of hair curlers (or you can substitute cardboard paper towel or toilet paper rolls)
- pink or red plastic pom-poms, or red construction paper cut into thin strips, or pink Easter grass
What To Do
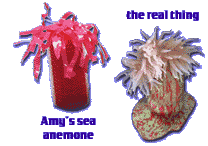
AN ANEMONE'S ANATOMY (say that three times fast!): Sea anemones are predators that usually attach their column-shaped bodies to coral, the sea floor, or rocks. Their tentacles have poisonous stinging cells (called nematocysts) which help them catch small fish, mussels, and other tiny sea creatures. Sea anemones are usually about 1 to 4 inches (2.5 to 10 centimeters) across.

Pull apart the plastic strands that make up the pink pom-pom, then cut them into thin strips.
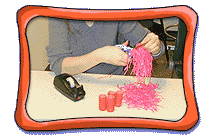

Stuff the pieces of pom-pom into the end of a hair curler.
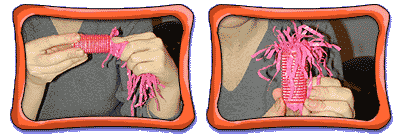

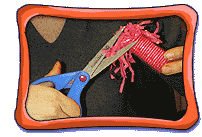
With scissors, trim the pom-pom threads so they are approximately the same length.

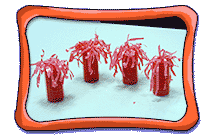
Repeat Steps 2 and 3 until you have four sea anemones.
Step 5: Making a Finger-shaped Sponge
What You'll Need
- about 6 to 10 tan-colored plastic hair curlers (the kind that have two parts)
- clear tape
- yellow Play DohTM
What To Do
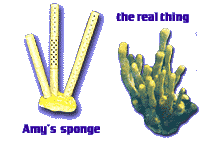
Totally Tubular: A sponge's body is covered with thousands of tiny holes called pores. The water flowing into the pores provides nutrients and oxygen. As the water flows out, it carries out the organism's waste.

Remove the outer covering of a hair curler, so that you are left with a tube with holes. Repeat this step for all 6 to 10 hair curlers.
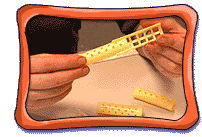

Tape two of the hair curler tubes together, so they form a tall column. Then tape on one more hair curler.
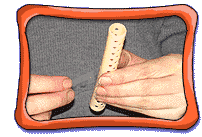

Repeat Step 2 with the remaining hair curlers. Make the sponge columns different lengths. (Some corals can be three hair curlers long; some two hair curlers long and so on.)

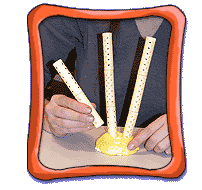
Stick the curler's into a holder made of Model Magic™ or Play Doh™.
Step 6: Putting it All Together
What To Do

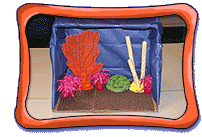
Put the different parts of your coral reef into the diorama box.
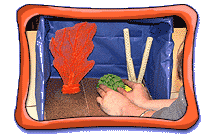

Congratulations! You did it. Step back and admire your coral reef diorama. Give a friend or family member a personal tour of your reef. Point out the different organisms and explain how they get food, protect themselves, and so on.
Taking Your Diorama to the Next Level
Other Ideas
If you'd like to develop your coral reef diorama even further, first explore pictures of coral reefs by looking at pictures online or in books at your library. Then look at these extra materials listed below for ideas of other materials you can use. Be creative!
- rocks and sand
- pasta of all shapes and sizes
- empty egg cartons
- breakfast cereals (Grape Nuts™, Kix™, flaked-shaped cereals etc.)
- old film containers
- Styrofoam packaging
- bubble wrap
- waffle cones
- candy (licorice, Pop Rocks™, Tootsie Rolls™, and so on)
- toothpicks
- twist ties
- sponges (you can cut these up into shapes)
- muffin wrappers
- toilet paper or paper towel rolls
- nipples for baby's bottle
- yogurt containers
GOOD PLACES TO BROWSE FOR SUPPLY IDEAS: hardware store, supermarkets, around the house
Amy's Extras
Here are just a few of the additional coral reef organisms you might include.
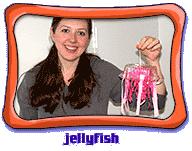
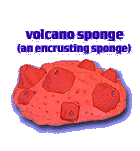
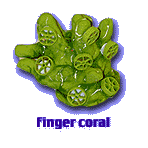
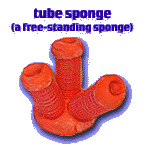
Image Credits:
Photos: Brain coral: courtesy of ReefNews, Jonathan Dowell; Fan coral: courtesy of Paul Janosi; Sea anemone: courtesy of California Academy of Sciences; Sponges: courtesy of REVEL Project, University of Washington; Andros Coral Reef: courtesy of AMNH, Denis Finnin; Supplies, What to Do (all photos); Amy's Extras (all photos): courtesy of AMNH; Illustrations: Sean Murtha


 Biodiversity
 Brain
Brain
 Genetics
 Marine BiOLogy
 MicrobiOLogy
 PaleontOLogy
 ZoOLogy
 AnthropOLogy
 ArchaeOLogy
 Astronomy
 Climate Change
 Earth
Earth
 Physics
 Water
Water

