
Activity Instructions
In this activity, you'll create your own three-dimensional shapes by making some origami models of simple boxes and containers. Once your models are complete, you'll draw these shapes to explore how three-dimensional shapes can be represented in two dimensions. You'll also observe and draw your models from different perspectives, or "frames of reference," to see that things look different depending on how you view them.

The Materials
- Origami paper (start with cheap, plain paper to practice; as you become more experienced, try foil-backed paper or paper with contrasting sides)
- Printed instructions:
- Pen, pencil, colored pencils, crayons
- Drawing paper
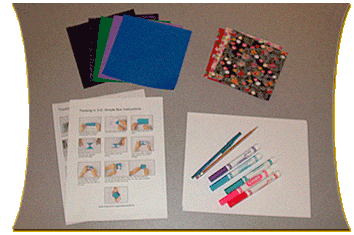
- Origami paper (start with cheap, plain paper to practice; as you become more experienced, try foil-backed paper or paper with contrasting sides)
- Printed instructions:
- Pen, pencil, colored pencils, crayons
- Drawing paper


What's Origami?
Origami is a traditional Japanese art of paper-folding. (In Japanese, "ori" means folding and "kami" means paper.) It has been an important part of Japanese culture since the sixth century. With origami, you can make simple shapes, like boxes and containers, or intricate designs and models of butterflies, frogs... anything you can imagine!
Try making your own origami. Here are two basic models. As you're making each model, think of the paper as a two-dimensional plane. At what point does each shape become three-dimensional? When your model is complete, look at it from different angles.
Print out the pdf instructions for each model.


Project Your Image in Two Dimensions:
Take a flashlight and shine it on your model so that it casts a shadow on the wall. Rotate the model and see how the shadow changes.

Drawing Three Dimensions in Two:
Draw your model on paper. What are some techniques you can use to make it look three-dimensional?

Changing Your Frame of Reference:
Rotate your model or shift your position so you're looking at it from another angle. Draw your model from at least two different angles.
Next, test your imagination:

The Incredible Shrinking You:
Imagine you were so small that you could fit inside your model. Think of ways that the model could look different, depending on your size and your location. Are you inside or outside the model? Draw at least two perspectives of what the model would look like to you.

Mini-you and Mini-me:
Working with a partner, pretend you're both small enough to fit inside your model. Now, both of you draw what the model would look like. Did you draw the same thing?

Movement and Perspective:
Imagine you are inside the box and your friend is outside the box. The box starts moving, about a foot in five seconds. After each second, how would the view from inside the box look to you? How would the box look to your friend who's watching outside? What if your friend looked at the box from a different angle?
How would you draw a four-dimensional shape? First, let's think about how you draw a three-dimensional shape, like a cube. A cube is basically a two-dimensional shape, a square, that has been moved through space. Likewise, a four-dimensional shape is a three-dimensional shape that has been moved in a direction perpendicular to our space. (This is difficult to understand since we can't really show this kind of motion.) If you moved a cube with this motion, you'd get a "hypercube," or four-dimensional cube.


 Biodiversity
 Brain
Brain
 Genetics
 Marine BiOLogy
 MicrobiOLogy
 PaleontOLogy
 ZoOLogy
 AnthropOLogy
 ArchaeOLogy
 Astronomy
 Climate Change
 Earth
Earth
 Physics
 Water
Water


