Corals
 Alvaro Keding/© AMNH
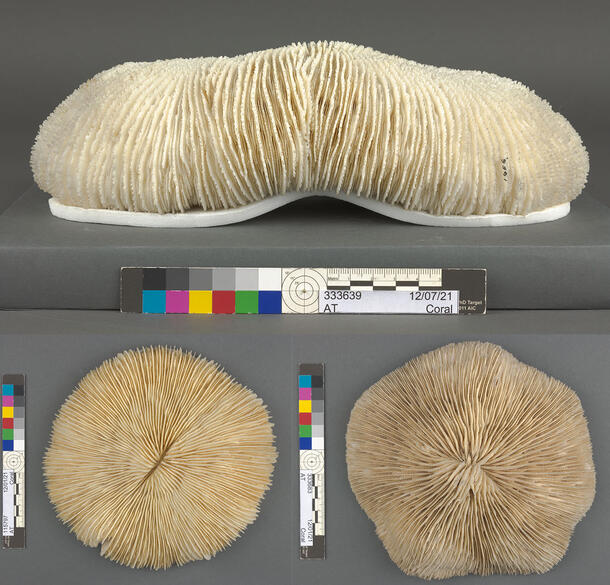
An array of dry coral specimens is featured on the first level of the Louis V. Gerstner, Jr. Collections Core, part of the Macaulay Family Foundation Collection Gallery, in the Richard Gilder Center for Science, Education, and Innovation.
Curated by Estefanía Rodríguez of the Division of Invertebrate Zoology, the display highlights the variety of shapes and sizes within the Museum's collection, showcasing corals resembling antlers, fans, and even brains.

What is a coral?
Corals are not acquatic plants—they are part of the animal kingdom, from the phylum Cnidaria, which includes sea anemones and jellyfish. There are two groups of corals, hard and soft, and representatives of both types are on display in the Collections Core.
Hard corals grow in colonies and have an aragonite (calcium carbonate crystal) skeleton. The colonies consist of thousands of individual live coral polyps that are cemented together by the calcium carbonate they secrete. Each polyp sits in a cup-like structure, known as a calyx, corallite, or calice. In the image below, you can see individual radial corallites arranged in rows. In other cases, the corallites arrange themselves in a meandering pattern. Hard corals are often called reef-builders because, over time, the skeleton becomes the rocky foundation upon which the next generation of infant corals settle.
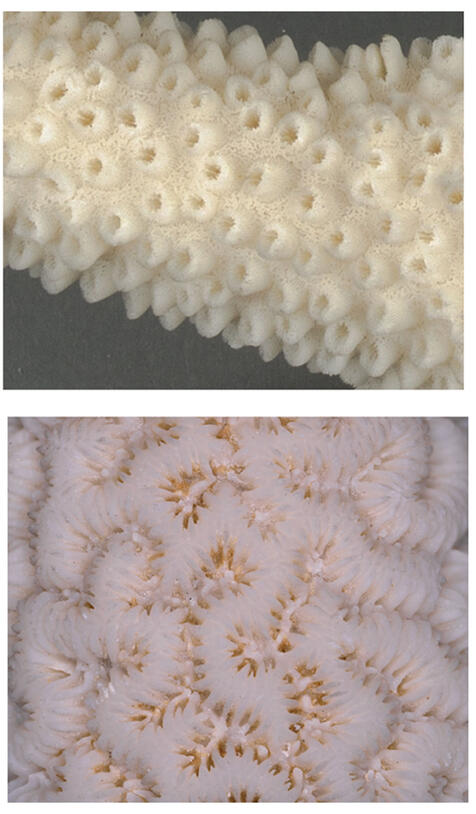
Like hard corals, soft corals are also mostly colonial. Colonies of individual polyps combine to form a larger singular unit. However, unlike hard corals, this type is not reef building. Soft corals are typically, as the name implies, soft and pliant, lacking a calcium carbonate skeleton. Examples of soft corals include sea fingers, sea fans, and mushroom corals. While soft corals do not have a rigid calcium carbonate skeleton, they do have small supports in the tissue called sclerites, which are also composed of calcium carbonate.
Conservation Needs
Corals selected for the Collections Core arrived at the conservation lab with accumulated dark gray and black dust on their cream-colored surfaces. Therefore, one of the primary tasks for the conservation team was to reduce and, if possible, remove the dirt. In addition, several specimens had structural damages and visually distracting previous repairs.
How were the corals cleaned?
While cleaning corals might appear relatively straightforward, it was critical to avoid damage to their fragile microstructure, which is vital to researchers’ efforts to identify their species and can provide information about the age and environment of a coral sample.
Cleaning tests were carried out by the conservation team on a separate small coral sample. Each test area was examined before and after cleaning using a digital microscope to look for evidence of damage to the corallite structure, and to assess the extent of dirt removal. The microscope records high-resolution stitched photomicrographs and uses Z-stacking to capture a well-focused image, despite the complex surface topography of the specimens. However, while this microscope-aided examination provides insight into changes caused by different cleaning methods, it cannot be used to rule out the possibility that damage is occurring at even smaller scales.
 Microscopic images (x50) of coral dry specimen fragment, before cleaning with Groom/Stick, 334975 Dendrogyra cylindrus.
 Nicole Feldman/© AMNH
 Microscopic images (x50) of coral dry specimen fragment after cleaning with Groom/Stick, 334975 Dendrogyra cylindrus.
 Nicole Feldman/© AMNH
Water flosser
A cordless dental water flosser was tested in one area of the broken coral fragment. The water flosser works by propelling a thin stream of water under variable pressure. The tool performed well in removing the dirt and grime, visible on the ridges towards the top left, from the surface. Additionally, no damage to the structure was observed under the microscope.
While the water flosser worked well for the coral fragment, it was not appropriate for specimens with attached wooden and painted bases because it was difficult to prevent overspray from extending beyond the target area, even with careful positioning and use of coverings.
Cosmetic sponge
Cosmetic sponges can be an effective tool for capturing dirt and dust on a wide variety of surfaces. They are typically made from polyurethane ether or ester foam, with various additives. In cleaning tests on coral, the sponge picked up some of the dirt on high points in the surface, but residual dirt remained bound in the coral’s interstices. While not as effective as the water flosser, the sponge did reduce dirt with minimal damage to the corallite structure.
Kneadable rubber cleaning putty
A kneadable cleaning putty was also tested on the coral but removed little if any dirt. Further, the sticky nature of the putty caused it to trap very small areas of coral and pull them loose. While this microstructural breakage was not visible in the photomicrographs, one can infer from coral fragments collected on the putty that some damage to the corallite structure occurred.
High-pile blanket and vacuum
The last method tested used a swatch of high-pile fabric , cut and placed over a vacuum nozzle fitted with a micro attachment. With the vacuum turned on, the wrapped nozzle was carefully dabbed against the coral, providing suction with gentle mechanical action. Results were similar to, if only slightly better than, the cosmetic sponges, with some of the dirt on high points of the surface removed. However, dirt was still bound in the interstices.
The results of testing allowed us to select a path forward for cleaning the corals. While the water flosser was the most successful in removing dirt and appeared to minimize damage to the coral microstructure, the inability to confine water to targeted areas was a major concern. Furthermore, the team could not be confident that the remaining methods would not damage the corallite structure. Therefore, light cleaning with cosmetic sponges and high-pile blanket and vacuum was carried out only in small areas with particularly severe dirt accumulation.
How were large broken pieces reattached?
 Coral dry specimen, before treatment, 334974 Dendrogyra cylindrus.
 Janet Spiller/© AMNH
 Coral dry specimen after treatment, 334974 Dendrogyra cylindrus.
 Janet Spiller/ © AMNH
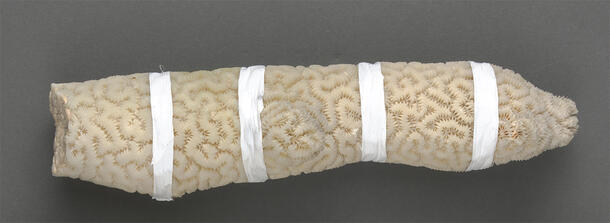
Two of the pillar corals selected for display had major breakages, with detached pillar extensions and visible cracks around previous repairs. On the broken pillars, old adhesive and fill material were visible. In some cases, old wooden dowels used to secure past repairs were visible.
 Detail of break on coral dry specimen with yellowed adhesive is visible on the break edges and has seeped into the corallite structure, 334974 Dendrogyra cylindrus,
Janet Spiller/ © AMNH
 Broken fragment of coral. 334974 Dendrogyra cylindrus
Janet Spiller/ © AMNH
The detached pillar extensions were reattached using a chemically stable, reversible, compatible adhesive. In cases where it was safe to do so, pre-existing dowels and holes were reused to provide added internal support. Areas around the join were filled and toned in a reversible manner to visually reintegrate the surface. The repairs are now structurally stable and while still visible under close examination, they are integrated with the surrounding area.
 Coral dry specimen, detail of repair to break with white fill material, 334974 Dendrogyra cylindrus.
 Nicole Feldman/© AMNH
 Coral dry specimen, detail of repair to break with fill material toned to match the surrounding area, 334974 Dendrogyra cylindrus.
 Nicole Feldman/ © AMNH